Poor indoor air quality affects millions of Canadian homes, but the right window ventilation strategy can transform your living space into a healthier, more comfortable environment. Natural ventilation through properly positioned windows allows fresh air to circulate freely whilst reducing energy costs and improving your family’s wellbeing throughout Ontario’s diverse seasons.
Window and Doors Replacement Near Me
Natural Ventilation and Its Benefits for Your Home
Natural ventilation works by using wind pressure and temperature differences to move air through your home without relying solely on mechanical systems. This process creates a continuous flow of outdoor air that replaces stale indoor air, helping to maintain optimal indoor climate conditions.
The benefits extend far beyond simply opening a window. Proper ventilation systems reduce humidity levels, prevent mildew growth, and filter out indoor pollutants naturally. During Ontario’s mild seasons, homeowners can significantly reduce energy use by relying on natural airflow instead of running air conditioning or heating systems continuously.
Modern homes often trap air due to improved insulation and weatherproofing, making strategic window placement and selection even more crucial for maintaining healthy indoor environments. When fresh air enters through thoughtfully positioned windows, it creates cross-ventilation patterns that cool spaces naturally and maintain comfortable temperatures.
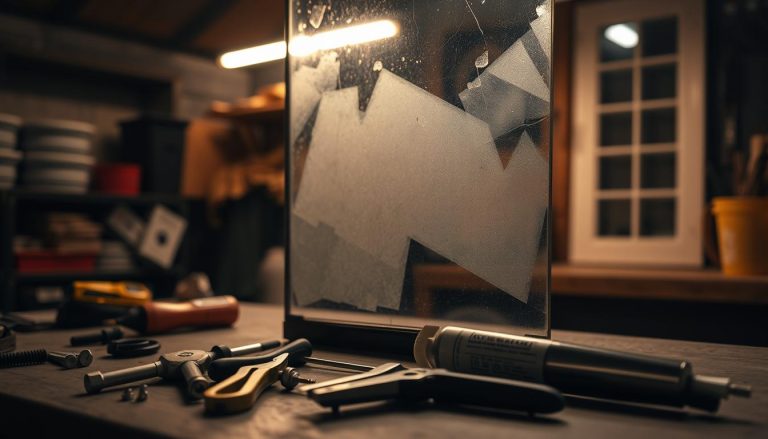
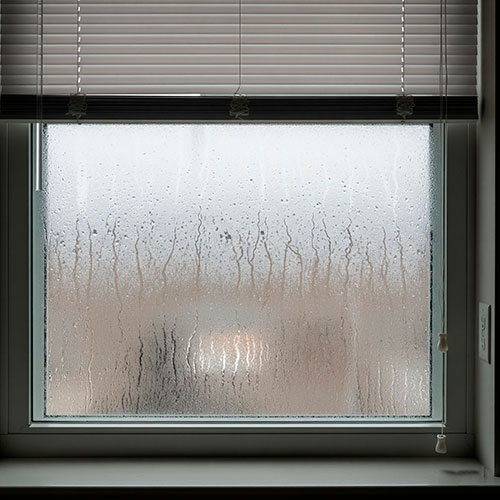
"We see this issue frequently in older homes throughout the Greater Toronto Area. The seal failure is often gradual, starting with small cracks that allow moisture to seep in during high humidity periods," explains Cherry Jian, Sales Consultant.
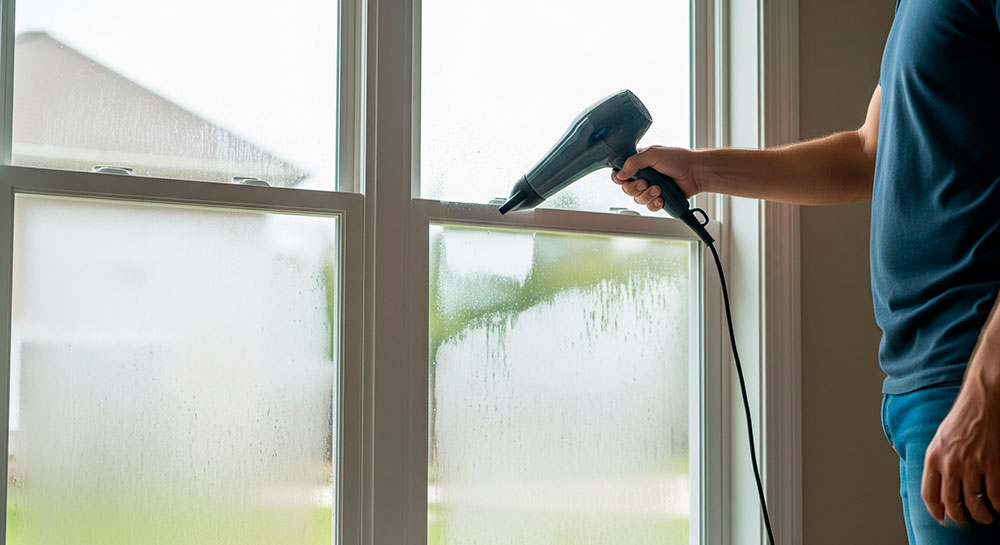
Step-by-Step Guide to Using a Hair Dryer
1. Prepare the Work Area
Before attempting to remove moisture with heat, ensure your workspace is ready:
- Clean the exterior window surface thoroughly
- Move any window blinds or curtains away from the window frame
- Verify access to a nearby electrical outlet
- Check that the window sash is securely closed
2. Set Up Your Hair Dryer
Proper setup prevents damage to your glass or frame:
- Use a hair dryer with variable heat settings
- Attach the concentrator nozzle if available
- Set to medium heat initially—high heat can cause thermal stress
- Ensure the cord won’t interfere with your movement
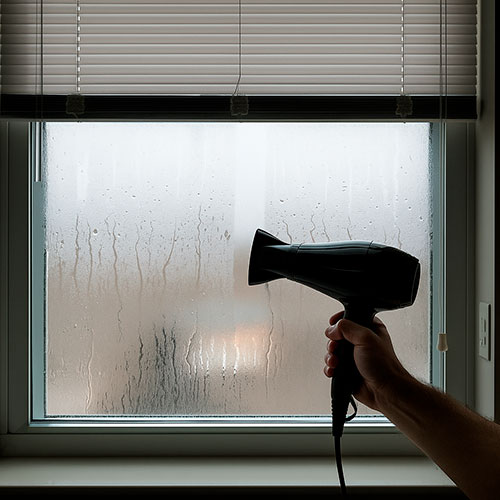
3. Apply Heat Strategically
The technique matters when directing warm air toward the sealed edge:
- Hold the hair dryer 6 inches (15 cm) from the glass surface
- Focus on the window frame perimeter where the spacer is located
- Use slow, sweeping motions to distribute heat evenly
- Pay special attention to the bottom edge where moisture tends to accumulate
- Avoid prolonged heat exposure on any single spot
4. Monitor Progress and Safety
Watch for changes while preventing damage:
- Observe as water droplets begin to evaporate
- Stop immediately if you notice any cracks forming
- The glass should feel warm but not hot to touch
- Allow brief cooling periods if the frame becomes very warm
5. Complete the Process
Finish with proper cleanup and ventilation:
- Wipe away any residual moisture with a soft cloth
- Open windows or use fans to ventilate the room
- This helps carry away evaporated moisture and prevents re-condensation
Explore energy-efficient options
Important Safety Considerations
| Risk Factor | Prevention Method | Why It Matters |
| Glass cracking | Use medium heat, keep moving | Thermal shock can shatter glass |
| Frame damage | Limit exposure time | Plastic materials can warp or melt |
| Electrical hazards | Keep cord dry, use GFCI outlet | Water and electricity don't mix |
"Safety should always come first when attempting DIY window repair. We've seen cases where improper heating techniques caused more damage than the original moisture problem," warns Eugene Siukayev, Project Manager.
Limitations of the Hair Dryer Method
While this technique can temporarily clear your view, it’s crucial to understand its limitations. The hair dryer only addresses the symptom—visible condensation—not the underlying cause of seal failure. Once the seal is broken, moisture will continue entering the space between panes, especially during periods of high humidity or rapid temperature changes.
When Professional Help Is Needed
Consider professional window replacement when:
- Condensation returns within days or weeks
- You notice multiple windows with the same problem
- The window frame shows signs of rot or damage
- Energy bills have increased noticeably
Professional Solutions for Permanent Repair
Experienced contractors can offer several options beyond temporary moisture removal:
- Seal Replacement: Some specialists can drill small holes in the spacer, remove existing moisture, and install one-way valves to prevent future condensation. However, this approach may compromise the window’s original energy efficiency.
- Complete Glass Unit Replacement: Replacing the entire insulated glass unit while keeping the existing frame often provides the best balance of cost and performance.
- Full Window Replacement: For older windows or those with frame damage, installing a new window ensures optimal energy efficiency and eliminates future moisture problems.
| Solution | Cost Range | Longevity | Energy Efficiency |
| Temporary fixes | £20-50 | Weeks to months | No improvement |
| Seal repair | £150-300 | 2-5 years | Partially restored |
| New glass unit | £300-600 | 15-20 years | Fully restored |
| Complete replacement | £400-800 | 20-30 years | Maximum efficiency |
"We always recommend evaluating the age and condition of the entire window before deciding on repair versus replacement. Sometimes investing in new energy-efficient windows makes more financial sense long-term," advises Daniel Klein, Project Manager.
Prevention Strategies
Preventing moisture problems begins with proper maintenance and environmental controls:
Humidity Management: Use extractor fans in bathrooms and kitchens to reduce interior moisture levels. Consider a whole-home dehumidifier during humid summer months.
Regular Inspection: Check window seals annually for signs of wear, especially around the spacer area where the glass panes meet the frame.
Proper Ventilation: Ensure adequate air circulation around windows. Avoid blocking vents or placing furniture too close to window units.
Professional Maintenance: Schedule regular inspections with qualified window specialists who can identify potential seal problems before they lead to moisture infiltration.
When to Consider Window Replacement
If you’re dealing with recurring moisture issues across multiple double pane windows, it may indicate that your home’s windows are approaching the end of their useful life. Modern replacement windows offer superior energy efficiency, advanced seal technology, and warranties that protect your investment.
At Total Home Windows and Doors, our engineering backgrounds help us design innovative solutions that prevent common moisture problems. Our Total Seal technology addresses the weak points where traditional windows are prone to seal failure, while our lifetime warranty ensures your peace of mind.
Conclusion
While using a hair dryer can temporarily remove moisture between window panes, it’s essential to address the root cause through professional repair or replacement. This approach not only restores your view but also maintains your home’s energy efficiency and prevents potential damage from ongoing moisture infiltration. For persistent problems or multiple affected windows, consulting with experienced professionals ensures you choose the most cost-effective long-term solution for your Ontario home.
Frequently Asked Questions
Is condensation between window panes normal?
No, window moisture between panes indicates a failed seal in your insulated glass unit. Normal condensation appears on interior surfaces during cold weather, but moisture trapped between glass panes suggests the manufacturer’s seal has developed leaks requiring professional attention.
Does condensation on windows mean poor insulation?
Not necessarily. Interior condensation during winter is common with temperature differences. However, when you can’t fix condensation because it’s trapped between panes, this indicates insulation failure and reduced energy efficiency requiring window repair or replacement.
How to get rid of mold between window panes?
Mold between sealed panes cannot be cleaned from outside. The entire insulated glass unit must be replaced since the wet environment between panes promotes mold growth. Professional replacement is the only effective answer to prevent health risks.
Can moisture between window panes be repaired?
Yes, though success varies. Professionals can drill holes to absorb moisture and install valves, but this may compromise the original seal. Complete glass unit replacement is often a great investment for lasting results and warranty protection.
How to get moisture out of double pane windows?
Hair dryers provide temporary relief by evaporating visible moisture, but the underlying seal failure remains. Professional repair involves drilling, moisture removal, and resealing. However, complete unit replacement offers the most reliable long-term answer for persistent issues.
How do you fix moisture in the inside of a window?
Interior moisture requires improved ventilation and humidity control. Use exhaust fans, dehumidifiers, and ensure adequate airflow. If moisture appears between panes where sun can’t dry it, the sealed unit needs professional replacement to prevent condensation.
Why is there moisture in between my windows?
Moisture occurs when seals develop small cracks allowing humid air inside the sealed space. Age, temperature cycles, and weather exposure cause seal deterioration. Single pane windows don’t have this issue, but modern sealed units can tear over time.