

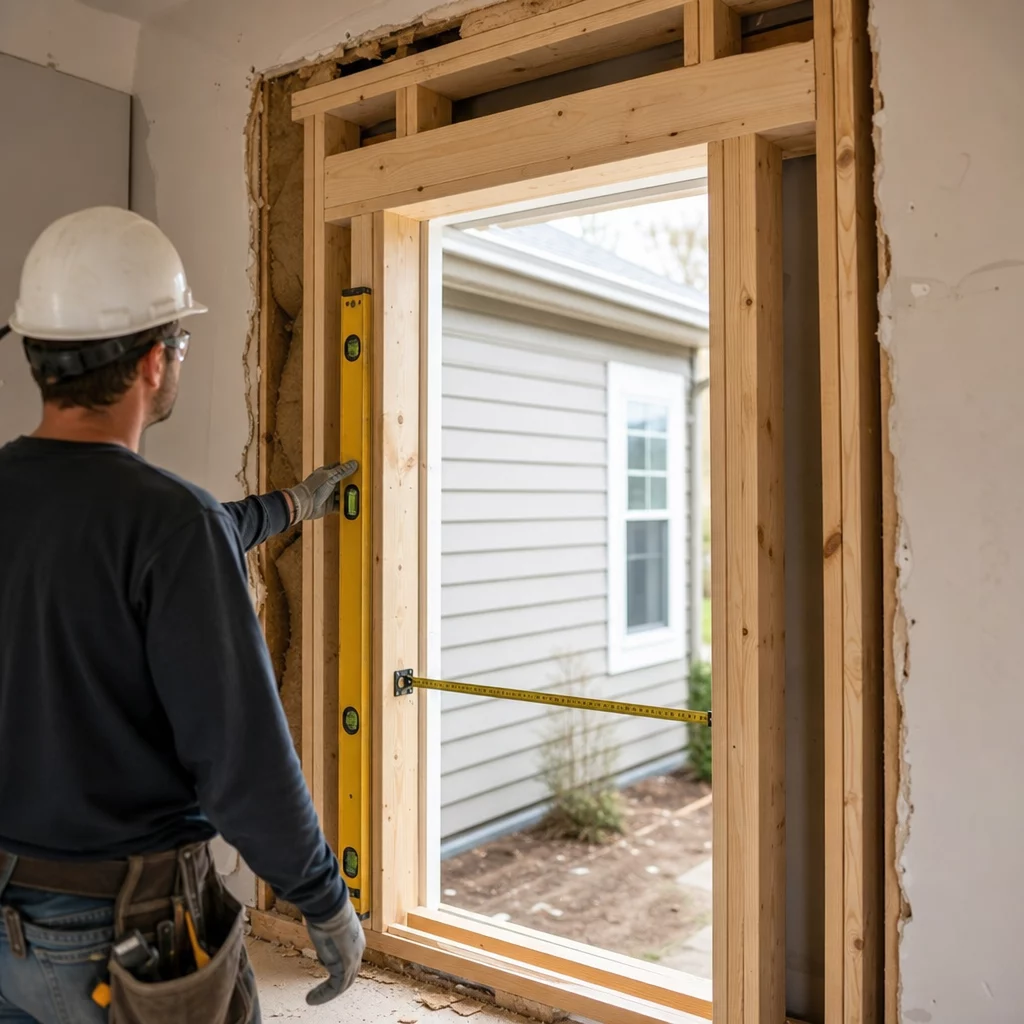
Framing an exterior door properly involves creating a structural opening that supports the door unit, maintains weatherproofing, and ensures smooth operation. You’ll need to build a rough opening 2 inches wider and 2.5 inches taller than your door frame, install king studs, jack studs, and a header beam, then verify everything is level and plumb before securing the door unit with shims and fasteners.
Key takeaways
- The rough opening should be 2 inches wider and 2.5 inches taller than your door frame to accommodate shimming and adjustment during installation
- King studs bear the full load from ceiling to floor, whilst jack studs support the header beam directly above the door opening
- A properly sized header beam is critical—undersized headers can cause structural failure and door operation issues over time
- Maintaining plumb and level throughout the framing process prevents binding, gaps, and premature weatherstripping failure
- Professional door installation services in Ontario typically cost $300-$800 for labour, depending on opening complexity and structural modifications required
Window and Doors Replacement Near Me
When should you frame an exterior door?
Understanding when to tackle door framing helps you plan properly and avoid costly mistakes. New construction obviously requires framing all openings from scratch, but several other scenarios demand this skill.
You’ll need to frame a new exterior door when adding an entrance to your home, converting a window opening to a door, or replacing a damaged frame that’s beyond repair. Structural issues like rot, termite damage, or water infiltration often mean the existing frame must be completely rebuilt rather than patched.
Seasonal considerations matter too. Spring and autumn offer ideal conditions—moderate temperatures make working outdoors comfortable, and you won’t expose your home’s interior to extreme cold or heat during the multi-day process. Winter framing is possible but challenging, whilst summer heat can make the physical labour exhausting.
Cost versus benefit timing depends on your situation. If you’re planning multiple renovations, coordinate door framing with other structural work to save on contractor visits. However, don’t delay if you notice frame deterioration—small problems become expensive repairs quickly. Energy savings from a properly framed and sealed exterior door can offset installation costs within 3-5 years through reduced heating and cooling bills.
Tip: Schedule your door framing project when you can leave the opening exposed for 2-3 days maximum. Weather delays happen, so have tarps and temporary barriers ready to protect your home if installation takes longer than expected.
According to Vitaly Shapiro, Vice President of Sales, “Homeowners often underestimate the structural complexity of door framing. What seems like a simple carpentry task actually requires precise measurements and understanding of load distribution. We regularly see DIY attempts that compromise wall integrity, leading to expensive corrections.”
Find related services
Tools and materials you’ll need
Gathering everything before you start prevents frustrating mid-project trips to the hardware shop. Here’s what you’ll need for a standard exterior door framing job.
Essential tools:
- Circular saw or mitre saw for cutting lumber
- Reciprocating saw for removing existing framing
- Hammer or framing nailer
- 4-foot and 6-foot levels
- Tape measure (25-foot minimum)
- Speed square and framing square
- Pry bar and cat’s paw
- Drill with assorted bits
- Chalk line
- Safety glasses and work gloves
Required materials:
- 2×4 or 2×6 lumber for studs (depending on wall thickness)
- Header material—double 2x10s or engineered lumber for spans over 3 feet
- 1/2-inch plywood for header spacer
- 16d galvanized framing nails
- 3-inch structural screws
- Shims (cedar or composite)
- Exterior-grade caulking and weatherproofing membrane
- Flashing tape for moisture protection
- Insulation for gaps around the frame
The specific door unit you’ve selected will determine some material choices. Steel doors, fibreglass doors, and wood doors all install into similar rough openings, but their weight affects header requirements. A solid wood or steel door in a 36-inch opening needs more robust support than a lightweight fibreglass unit.
Safety notes
Door framing involves significant structural modifications that can be dangerous if proper precautions aren’t followed. Always wear safety glasses when cutting lumber or using power tools—flying wood chips and sawdust pose serious eye injury risks. Heavy-duty work gloves protect your hands from splinters, sharp edges, and the weight of lumber.
When working on load-bearing walls, never remove existing studs without installing temporary support. A wall that collapses during framing can cause catastrophic structural damage and severe injury. If you’re uncertain whether a wall is load-bearing, consult a structural engineer before proceeding.
Power tool safety is paramount. Keep circular saw blades sharp and properly adjusted, ensure all guards function correctly, and never disable safety features. Disconnect power tools when changing blades or bits. Use proper lifting techniques when handling heavy headers and lumber—bend at the knees, not the waist, and get help with anything over 50 pounds.
Weather considerations matter for safety too. Don’t work in rain or snow, as slippery conditions increase fall risks. If you’re working above ground level, use proper scaffolding or ladders rated for your combined weight plus tools. Secure the work area to prevent family members or pets from entering whilst tools and materials are present.
Find the Best Window Styles for your Home
Step-by-step instructions
Time required: 6-10 hours for an experienced DIYer, potentially 12-16 hours for first-timers. This assumes you’re creating a new opening in an existing wall, not just replacing a door in an existing frame.
Step 1: measure and mark the rough opening
Start by determining your rough opening dimensions. Add 2 inches to your door frame width and 2.5 inches to the height. For a standard 36-inch door with a typical frame, you’ll need a rough opening of approximately 38 inches wide by 82.5 inches tall. Use a level and chalk line to mark these dimensions on both sides of the wall. Double-check measurements three times—mistakes here cascade through every subsequent step.
Step 2: remove existing wall covering
Cut away drywall or plaster at least 6 inches beyond your marked opening on both sides of the wall. This extra space lets you work comfortably and see the full stud layout. Use a utility knife to score the surface before cutting to minimize damage to surrounding areas. Remove insulation carefully and set it aside if it’s reusable. Inspect the cavity for electrical wiring or plumbing that needs rerouting.
Step 3: install king studs
King studs run full height from the bottom plate to the top plate and bear the structural load. If you’re creating a new opening, you may need to add these. Position them at the outer edges of your rough opening width. Secure king studs with 16d nails every 16 inches, driving three nails through the plates into each stud end. These must be perfectly plumb—check with your 6-foot level.
Step 4: cut and install the header
The header beam spans the door opening and supports the weight above. For a 3-foot opening in a single-storey wall, use doubled 2x8s. Wider openings or two-storey loads require 2x10s or 2x12s. Sandwich a 1/2-inch plywood spacer between the two boards to match the wall thickness. Cut the header to span from king stud to king stud. Position it at the top of your rough opening height and secure it to the king studs with 16d nails.
Step 5: install jack studs
Jack studs (also called trimmer studs) sit inside the king studs and directly support the header. Measure from the bottom plate to the underside of your header and cut two jack studs to this length. Position them against the king studs and nail through the king studs into the jack studs every 16 inches. Also nail up through the jack studs into the header for additional support.
Step 6: install cripple studs
Short cripple studs fill the space between the header and the top plate, maintaining wall strength and providing backing for interior finishes. Space them 16 inches on centre, matching your wall’s existing stud layout. Cut each to fit snugly between the header and top plate, then toenail them in place with three nails per end.
Step 7: cut and frame the bottom
Cut out the bottom plate between the jack studs using a reciprocating saw. Make your cuts flush with the inside edges of the jack studs. If you’re working on a concrete slab, you may need to cut the plate in sections and pry it up. Some builders prefer to leave a short section of bottom plate temporarily for stability during door installation, then cut it out just before setting the door.
Step 8: verify square, level, and plumb
Before proceeding, meticulously check your work. The rough opening must be perfectly square—measure diagonally from corner to corner both ways. If measurements differ by more than 1/4 inch, something is out of square. Check that jack studs are plumb with your level. Verify the header is level across its span. These checks prevent door operation problems later.
Step 9: apply weatherproofing membrane
Wrap the rough opening with a waterproof membrane or building paper, lapping it like shingles so water drains outward. Start at the bottom and work up, overlapping each layer by at least 3 inches. Pay special attention to corners where water typically infiltrates. Apply self-adhesive flashing tape over the membrane at the sill for extra protection. This step is critical for energy efficiency and preventing moisture damage.
Step 10: install the door unit
With your framing complete, you’re ready to install the door. This process varies by door type, but generally involves setting the unit in the opening, shimming it level and plumb, and securing it through the frame into the jack studs. Use pairs of shims at hinge locations and lock locations, adjusting until the door operates smoothly without binding. Once positioned correctly, drive 3-inch screws through the shims into the framing.
Tip: Don’t nail or screw the door frame tight against the rough opening. Always use shims to create a small gap that allows for final adjustment. This flexibility is essential for achieving perfect alignment and smooth door operation.
Best window companies reviews
Common mistakes to avoid
| Mistake | How to fix or prevent it |
|---|---|
| Rough opening too small | Always add 2 inches to width and 2.5 inches to height. If already cut too small, you’ll need to reframe wider—there’s no shortcut. |
| Undersized header beam | Consult span tables for your specific load conditions. When in doubt, go one size larger. Replacing an undersized header later requires dismantling the entire frame. |
| Skipping the king studs | Never support a header directly on jack studs alone. King studs distribute loads to the foundation and prevent settling that causes door problems. |
| Poor weatherproofing | Apply membrane and flashing before installing the door, not after. Water damage from skipped weatherproofing can cost thousands to repair. |
| Not checking for plumb and level | Check multiple times during framing, not just at the end. A frame that’s 1/2 inch out of plumb will cause the door to swing open or closed on its own. |
| Cutting load-bearing studs without support | Install temporary bracing before removing any studs in load-bearing walls. Structural collapse can occur within seconds of removing critical support. |
Eugene Siukayev, Project Manager, notes that “The most expensive mistakes happen when homeowners don’t account for structural loads. I’ve seen cases where improper headers caused ceiling cracks and door frames that twisted within months. Always err on the side of over-engineering rather than under-engineering your framing.”
Cost breakdown
Understanding the financial investment helps you budget appropriately and decide between DIY and professional installation.
| Cost component | DIY cost (CAD) | Professional cost (CAD) |
|---|---|---|
| Lumber and framing materials | $150-$300 | $150-$300 (included in quote) |
| Weatherproofing and flashing | $50-$100 | $50-$100 (included in quote) |
| Fasteners and hardware | $30-$60 | $30-$60 (included in quote) |
| Tool rental (if needed) | $100-$200 | N/A |
| Labour | Your time (16-24 hours) | $300-$800 |
| Total | $330-$660 | $530-$1,260 |
Several factors affect the final price. Wall construction type matters—brick veneer or stone exteriors require additional labour and materials compared to vinyl siding. Load-bearing walls need engineered headers that cost more than standard lumber. Second-storey installations increase labour costs by 30-50% due to scaffolding requirements and safety considerations.
Geographic location within Ontario influences pricing too. Toronto and Mississauga contractors typically charge 15-20% more than those in smaller cities like Kingston or Stratford. The complexity of your specific project—working around plumbing, rerouting electrical, or matching unusual wall thicknesses—adds to both material and labour costs.
Don’t forget peripheral expenses. You may need building permits ($50-$150), dumpster rental for debris removal ($200-$400), and interior/exterior finishing work after framing is complete. If structural modifications require engineering approval, add $300-$600 for a stamped drawing.
DIY vs professional installation
Deciding whether to tackle door framing yourself or hire professionals depends on your skill level, available time, and project complexity. Here’s what to consider.
When DIY is realistic:
- You have carpentry experience and own or can borrow necessary tools
- The wall is non-load-bearing or you’re confident working with temporary supports
- You can dedicate a full weekend to the project without rushing
- The opening is on ground level with easy access
- You’re comfortable obtaining permits and arranging inspections yourself
When to hire professionals:
- The wall is load-bearing and supports a second storey or roof trusses
- You need to reroute electrical wiring, plumbing, or HVAC ducts
- The project involves brick, stone, or concrete that requires specialized cutting
- You lack the tools or experience to ensure structural integrity
- Time constraints mean you need the job completed quickly
DIY risks: Structural mistakes can compromise your home’s integrity and create dangerous conditions. Improper framing voids warranties on door units and may violate building codes, causing problems when you sell. Insurance may not cover damage from unpermitted DIY structural work.
DIY benefits: Significant cost savings on labour, flexible scheduling around your availability, and the satisfaction of completing a major home improvement project yourself. You’ll gain valuable skills applicable to future renovations.
Professional risks: Higher upfront costs, dependency on contractor schedules, and the possibility of hiring an unqualified installer who does substandard work.
Professional benefits: Guaranteed structural integrity, proper permitting and code compliance, efficient completion (typically 1-2 days), and warranty coverage on both labour and installation. Experienced installers spot potential problems before they become expensive repairs.
For homeowners in the Greater Toronto Area, Total Home Windows and Doors offers professional door framing and installation services backed by decades of experience. Our team handles everything from permits to final inspection, ensuring your new entrance meets all Ontario building codes.
According to Daniel Klein, Project Manager, “We frequently repair framing that homeowners attempted themselves. The most common issue is inadequate header sizing, which causes sagging and door operation problems within a year. Professional installation costs more initially but prevents expensive corrections later. Our installations come with comprehensive warranties that DIY projects simply can’t match.”
Ready to upgrade your home’s entrance?
Proper door framing is the foundation of a secure, energy-efficient entrance that will serve your home for decades. Whether you’ve decided to tackle this project yourself or prefer professional installation, the key is ensuring structural integrity and weatherproofing from the start. If you’re in Ontario and want expert installation with guaranteed results, contact Total Home Windows and Doors for a free consultation. Our experienced team will assess your specific needs, provide a detailed quote, and complete your door framing and installation with precision. Don’t compromise on quality—get your project done right the first time.
FAQ
How long does it take to frame an exterior door opening?
An experienced carpenter can frame a standard exterior door in 4-6 hours. DIY homeowners should expect 8-12 hours spread over two days, allowing time for careful measurements and corrections.
Can I frame a door in a load-bearing wall myself?
Yes, but you must install temporary support before removing studs and use properly sized headers. If you’re uncertain about structural requirements, consult an engineer or hire a professional to avoid catastrophic failures.
What size header do I need for a 36-inch exterior door?
For single-storey walls, doubled 2x8s typically suffice. Two-storey homes require 2x10s or 2x12s. Always consult local span tables and building codes, as snow loads and roof design affect requirements significantly in Canadian climates.
Do I need a building permit to frame a new exterior door?
Most Ontario municipalities require permits for new door openings or enlarging existing ones, especially in load-bearing walls. Permits typically cost $50-$150 and ensure your work meets structural and fire safety codes.
How much does professional door framing cost in Ontario?
Professional framing and installation ranges from $530-$1,260 depending on wall type, location accessibility, and structural complexity. This includes materials, labour, and basic weatherproofing. Complex projects with brick exteriors or second-storey access cost more.