

Installing a keyless entry door lock is a straightforward DIY project that takes 30-60 minutes with basic tools. You’ll replace your existing deadbolt with a smart lock featuring keypad or biometric access, eliminating the need for traditional keys whilst boosting home security. Most models fit standard door preparations, requiring only a screwdriver and measuring tape to complete the installation successfully.
Key takeaways
- Keyless entry locks fit standard door preparations (2-1/8″ bore hole) and work with most exterior doors, making retrofit installation simple for homeowners.
- Battery-powered models last 6-12 months on standard batteries, with low-battery warnings providing ample time for replacement before lockouts occur.
- Professional installation costs $150-$300 CAD, whilst DIY installation requires only a screwdriver, drill, and measuring tape for most applications.
- Smart locks with Wi-Fi connectivity allow remote access control and activity monitoring through smartphone apps, enhancing security beyond traditional deadbolts.
- Proper alignment of the latch bolt and strike plate is critical—misalignment causes operational failures and premature battery drain in electronic components.
Window and Doors Replacement Near Me
When should you install a keyless entry lock?
Consider upgrading to a keyless entry door lock when you’re tired of carrying keys or frequently lock yourself out. Many Canadian homeowners make the switch during exterior door replacement projects or when moving into a new property.
Seasonal considerations matter. Install during mild weather when you can comfortably work with the door open. Winter installations in Ontario can be challenging with freezing temperatures affecting battery performance during initial setup. Spring and autumn offer ideal conditions for testing the system thoroughly.
Signs you need an upgrade include:
- Worn or damaged existing deadbolts that stick or fail to engage properly
- Multiple family members needing access without key duplication costs
- Rental properties requiring frequent access code changes between tenants
- Security concerns after lost keys or staff turnover
The cost-benefit calculation favours DIY installation. Professional locksmith services charge $150-$300 CAD for installation alone, whilst the lock hardware ranges from $120-$400 CAD depending on features. Installing yourself saves the labour cost entirely, with the project paying for itself in convenience within months.
Tip: Install keyless locks on all entry door locks simultaneously to create a unified access system. This approach simplifies code management and ensures consistent security across all entry points.
According to Vitaly Shapiro, Vice President of Sales, “Homeowners often underestimate how much daily convenience impacts quality of life. A keyless system eliminates the fumbling with keys in winter weather—a significant benefit in Canadian climates where gloves and packages make traditional keys impractical.”
Find related services
Tools and materials you’ll need
Gather these items before starting your installation to avoid mid-project interruptions:
Tools required:
- Phillips-head screwdriver (primary tool for most installations)
- Flathead screwdriver (for prying and adjustment)
- Tape measure (for precise measurements)
- Drill with bits (only if enlarging holes or creating new preparations)
- Chisel (for strike plate adjustments)
- Pencil (for marking positions)
- Level (ensuring proper alignment)
Materials needed:
- Keyless entry lock kit (complete with interior and exterior assemblies)
- Batteries (typically 4 AA batteries, check manufacturer specifications)
- Wood screws (usually included with lock kit)
- Strike plate (included in quality kits)
- Latch bolt assembly (comes with lock system)
- Installation template (provided by manufacturer)
Most keyless entry systems designed for residential use include comprehensive installation hardware. Verify your existing door has a standard 2-1/8″ diameter bore hole and 1″ cross bore. Non-standard preparations may require additional drilling or professional assistance.
Safety notes
Working with exterior door styles requires attention to security during installation. Never leave your door completely unsecured whilst working—maintain at least one functional lock or have someone present to monitor the entrance. Remove batteries from the new lock before beginning to prevent accidental lockouts during testing phases.
Wear safety glasses when drilling or chiselling to protect against wood chips and metal shavings. Keep the work area well-lit, especially when working with small screws and electronic components. If your lock connects to home Wi-Fi, ensure your network password is secure before programming the device—weak passwords compromise the entire security system.
Test the mechanical operation thoroughly before relying solely on electronic features. A properly installed deadbolt should extend and retract smoothly without binding. Sharp edges on strike plates can cause injuries during installation—file down any burrs before handling. Finally, keep the manufacturer’s emergency key in a secure location separate from the property as a backup access method.
Find the Best Window Styles for your Home
Step-by-step instructions
Time required: 30-60 minutes for standard installations
Step 1: Remove the existing lock
Begin by opening the door fully and securing it in place. Locate the screws on the interior side of your current deadbolt—these typically sit along the edge of the interior plate. Use a Phillips-head screwdriver to remove these mounting screws completely. Pull the interior and exterior lock assemblies apart, separating them from the door. Remove the latch bolt assembly from the door edge by unscrewing the two faceplate screws. Keep the old strike plate screws for potential reuse if the new hardware doesn’t fit properly.
Step 2: Prepare the door opening
Clean the bore holes thoroughly, removing any debris, old lubricant, or paint buildup that could interfere with the new mechanism. Measure the backset distance—the measurement from the door edge to the centre of the bore hole. Standard residential doors use either 2-3/8″ or 2-3/4″ backsets. Verify your new lock matches this measurement. Check that the cross bore (the hole through the door face) measures 2-1/8″ in diameter. If previous hardware was different, you may need to enlarge holes or use adapter plates included with premium lock kits.
Step 3: Install the latch bolt assembly
Insert the new latch bolt into the edge bore hole, ensuring the angled side of the latch faces the direction the door closes. The flat faceplate should sit flush against the door edge. If it protrudes, use a chisel to deepen the mortise slightly. Secure the latch with the provided screws, tightening them firmly but not excessively—over-tightening can strip the wood or warp the faceplate. Test the latch operation by pressing it with your finger; it should spring back smoothly without sticking or hesitation.
Step 4: Install the exterior assembly
Feed the cable or connection rod from the exterior keypad assembly through the large bore hole. Align the exterior mounting plate with the latch mechanism, ensuring the tailpiece engages properly with the latch bolt. The keypad should sit centred on the door face with no gaps around the edges. Some models require specific orientation—check that any logos or displays face upright. Don’t secure screws yet; just position the assembly for the next step.
Step 5: Attach the interior assembly
Position the interior assembly over the protruding bolts or cable connections from the exterior unit. Align the screw holes carefully—misalignment causes stripped threads and loose installations. Connect any wiring harnesses according to the colour-coded instructions provided. Insert and hand-tighten the long mounting screws that pass through both assemblies, securing them together. Use a screwdriver to tighten these screws in a cross pattern, alternating between top and bottom to ensure even pressure. The assemblies should feel solid without excessive play.
Step 6: Install the strike plate
Close the door and mark where the latch bolt contacts the door frame. Position the new strike plate over this mark, ensuring the bolt opening aligns perfectly with the latch path. Trace the strike plate outline if it’s larger than the existing mortise. Chisel out additional wood as needed for a flush fit. Secure the strike plate with the provided screws, driving them into solid wood framing—not just the door jamb trim. A properly installed strike plate is critical for security and smooth operation.
Step 7: Install batteries and programme codes
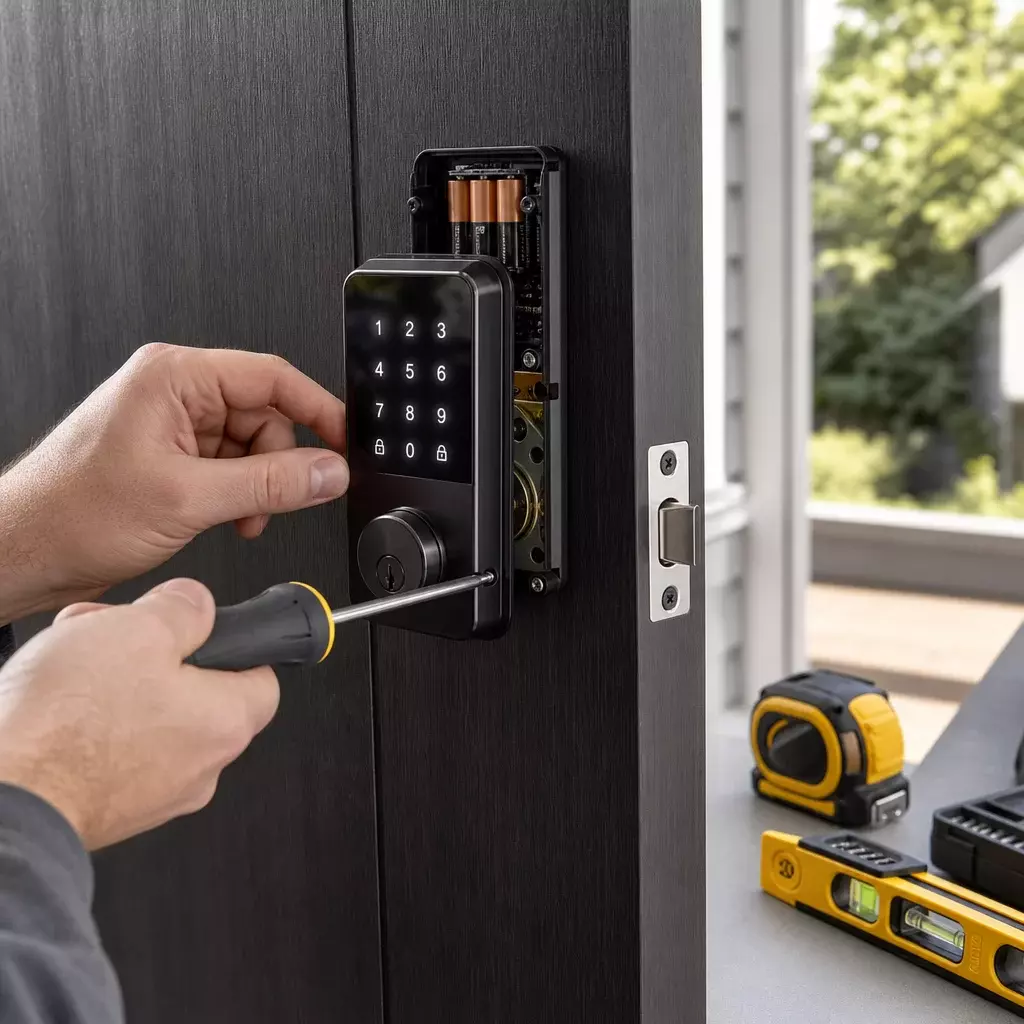
Insert fresh batteries into the interior assembly, observing proper polarity markings. Most units illuminate or beep when powered correctly. Follow the manufacturer’s programming sequence to set your master code—typically involving pressing a programme button and entering a 4-8 digit code. Test the master code multiple times before programming additional user codes. Set up user codes for family members, ensuring each person has a unique identifier for access tracking if your model supports activity logs.
Step 8: Test operation and adjust
Test the lock from both sides with the door open, verifying smooth extension and retraction of the deadbolt. Close the door and test locking and unlocking from outside using your programmed codes. Check that the bolt fully extends into the strike plate without binding. If the bolt catches or requires force, adjust the strike plate position slightly. Test the manual key override if your model includes one. Verify auto-lock features if enabled, and confirm that low-battery warnings function properly by temporarily removing one battery.
Best window companies reviews
Common mistakes to avoid
| Mistake | How to Fix It |
|---|---|
| Misaligned latch bolt and strike plate causing binding | Loosen strike plate screws and shift position up/down or in/out until bolt slides freely. Use a file to enlarge the strike opening if needed. |
| Over-tightening screws that strip wood or crack plastic housings | Stop when screws feel snug. If stripped, fill holes with wood filler, let dry, then re-drill pilot holes before reinstalling screws. |
| Installing batteries before completing mechanical assembly | Remove batteries until all hardware is secured. This prevents accidental lockouts and allows free movement during adjustments. |
| Failing to test with door open first | Always verify operation with door open before closing. This prevents lockouts if programming or mechanical issues arise during initial setup. |
| Using weak or duplicate access codes | Create unique codes for each user. Avoid sequential numbers (1234) or birthdates. Use random 6-8 digit combinations for maximum security. |
| Ignoring backset measurements | Measure twice before purchasing. If backset doesn’t match, return the lock or use adjustable models designed for multiple backset configurations. |
Tip: Take photos of the wiring connections before disconnecting anything during installation. These reference images prove invaluable if you need to troubleshoot connection issues later.
Cost breakdown
Understanding the financial investment helps you budget appropriately for your door installation project.
| Item | DIY Cost | Professional Installation Cost |
|---|---|---|
| Basic keyless entry lock (keypad only) | $120-$180 CAD | $270-$480 CAD (including labour) |
| Mid-range smart lock (Wi-Fi enabled) | $200-$300 CAD | $350-$600 CAD (including labour) |
| Premium smart lock (biometric, remote access) | $300-$450 CAD | $450-$750 CAD (including labour) |
| Installation labour (professional) | $0 | $150-$300 CAD |
| Additional tools (if needed) | $20-$50 CAD | Included |
Factors affecting price:
- Smart home integration capabilities (Z-Wave, Bluetooth, Wi-Fi connectivity)
- Biometric features like fingerprint readers increase costs by $100-$150 CAD
- Brand reputation and warranty coverage—premium brands charge 30-40% more
- Finish options (brushed nickel, oil-rubbed bronze, satin chrome) add $20-$40 CAD
- Door preparation requirements—non-standard bore holes require professional drilling
- Remote access subscriptions for cloud-based systems ($3-$10 CAD monthly)
Most Canadian homeowners recover DIY installation savings within the first year through eliminated locksmith calls and key replacement costs. According to Eugene Siukayev, Project Manager, “The real value extends beyond initial costs. Smart locks reduce insurance premiums for some providers and increase home resale value—buyers appreciate modern security features.”
DIY vs professional installation
| DIY Installation | Professional Installation | |
|---|---|---|
| Benefits | Saves $150-$300 CAD in labour costs. Complete control over timing and process. Learning experience for future projects. Immediate installation without scheduling delays. Satisfaction of completing home improvement independently. | Guaranteed proper alignment and operation. Warranty protection on installation work. Professional troubleshooting of door preparation issues. Time savings—typically completed in 20-30 minutes. Expert advice on optimal lock positioning and security features. |
| Risks | Potential for misalignment causing premature wear. Risk of damaging door or lock components. No warranty coverage if self-installation voids manufacturer guarantee. May require additional tool purchases. Troubleshooting falls entirely on homeowner. | Higher upfront cost reducing budget for premium lock models. Scheduling constraints and potential waiting periods. Less familiarity with your specific lock’s features. Possible upselling of unnecessary services or products. |
Choose DIY installation if you have basic tool skills and your door has standard preparations. The process is genuinely straightforward for most modern locks designed with homeowner installation in mind. Select professional installation for custom exterior doors with non-standard configurations, antique doors requiring special handling, or if you lack confidence in precise alignment work.
Alexandr Naumov, Project Manager, notes: “We see excellent DIY results when homeowners follow instructions carefully and don’t rush the alignment phase. The most common professional call-backs involve strike plate positioning—taking extra time here prevents future issues. For complex smart home integrations requiring network configuration and multiple device synchronisation, professional setup ensures optimal performance from day one.”
Next steps for your home security upgrade
Now that you understand the installation process, visit the Total Home Windows and Doors showroom to see keyless entry systems in action. Our security experts will help you select the perfect lock for your specific door type and security requirements. We’ll verify your door’s compatibility, discuss smart home integration options, and provide hands-on demonstrations of different models. Book your consultation today and receive a complimentary home security assessment worth $150 CAD—our team will evaluate all entry points and recommend comprehensive solutions tailored to your property. Contact us at Total Home Windows and Doors to schedule your appointment and take the first step toward keyless convenience and enhanced security.
FAQs
Can keyless entry locks be hacked or bypassed easily?
Quality keyless locks use encrypted communication and anti-tampering features. Physical bypass is harder than traditional locks. Choose models with auto-lockout after failed attempts and two-factor authentication for maximum security against digital intrusion.
How long do batteries last in keyless entry door locks?
Standard alkaline batteries last 6-12 months with typical use (10-15 entries daily). Cold Canadian winters reduce battery life by 20-30%. Most locks provide low-battery warnings 2-4 weeks before complete depletion, allowing ample replacement time.
Will a keyless lock work during power outages?
Yes, battery-powered keyless locks operate independently of home electrical systems. They function normally during outages. Keep fresh backup batteries stored nearby. Most models include emergency key override as additional backup access during battery failures.
Can I install a keyless lock on any exterior door?
Most steel doors, fiberglass doors, and wood doors with standard bore holes accept keyless locks. French doors, sliding doors, and non-standard preparations may require adapters or professional modification. Measure your door’s backset and bore diameter before purchasing.
Do keyless entry locks increase home insurance costs?
No, they typically reduce premiums. Many Canadian insurers offer 5-10% discounts for smart security features. Document your installation with photos and receipts. Contact your insurance provider to verify eligibility for security upgrade discounts and required documentation.