Measuring a bow window for replacement requires recording the width, height, and depth at multiple points, checking for square using diagonal measurements, and documenting the frame type and jamb depth. Accurate measurements ensure your new unit fits properly, prevents drafts, and avoids costly installation delays or returns.
Key takeaways
- Measure width at the top, middle, and bottom of the opening, then use the smallest dimension to ensure proper fit and account for structural settling.
- Record height measurements on both left and right sides plus centre, as bow windows often sit in openings that aren’t perfectly level.
- Depth measurement from the exterior wall surface to the interior wall surface determines jamb depth requirements for your replacement bow window.
- Check diagonal measurements from corner to corner; a difference greater than 6mm indicates the opening is out of square and may need adjustment.
- Document the current window’s projection distance from the wall, as this affects both aesthetics and interior space in your replacement.
Window and Doors Replacement Near Me
When should you measure for bow window replacement?
You’ll know it’s time to measure for a bow window replacement when you notice condensation between glass panes, visible frame rot or warping, difficulty operating individual sections, or drafts that drive up heating costs. According to Vitaly Shapiro, Vice President of Sales, “Canadian homeowners typically consider bow window replacement after 20-25 years, or sooner if they notice significant energy loss during winter months.”
Spring and autumn offer ideal measuring conditions because moderate temperatures prevent extreme expansion or contraction of materials. Winter measurements can be valuable too, as they reveal air leakage issues more clearly. Summer heat may cause slight frame expansion, so note the season when you measure.
Consider replacement timing if you’re planning exterior renovations, repainting, or siding work. Coordinating these projects saves money on scaffolding and labour. Energy bill spikes exceeding 15-20% compared to previous years often signal that your bow window’s insulation has failed.
Measure during daylight hours when you can clearly see the frame edges and identify any structural issues that might affect installation.
Find related services
Tools and materials you’ll need
Gathering the right equipment before you start ensures accurate measurements and prevents multiple trips up and down ladders. Professional-grade tools deliver better results than basic household items.
Essential measuring tools
- 25-foot retractable steel tape measure (cloth tapes stretch and give inaccurate readings)
- 6-foot level to check horizontal and vertical alignment
- Carpenter’s square for checking corners
- Notepad and pencil for recording measurements
- Digital camera or smartphone for reference photos
- Flashlight to inspect interior jamb conditions
Optional but helpful items
- Laser distance measurer for hard-to-reach areas
- Ladder or step stool for accessing upper sections
- Plumb bob to verify vertical alignment
- Moisture meter to detect hidden water damage
- Chalk or painter’s tape to mark measurement points
Safety notes
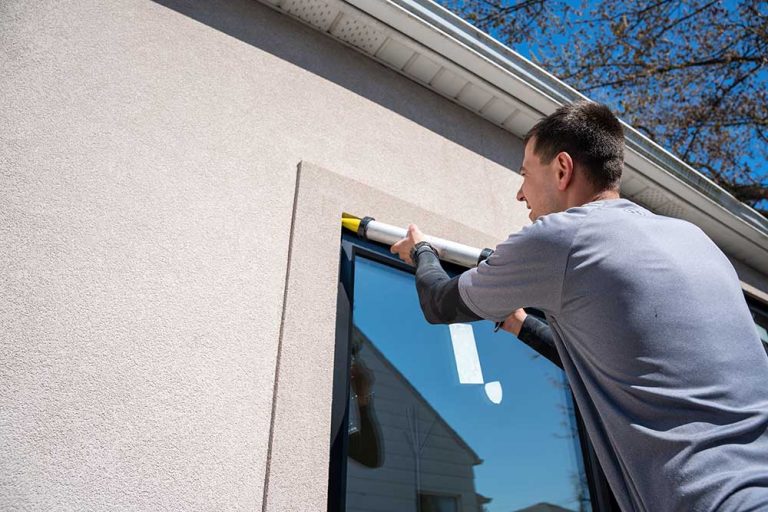
Working around windows, especially on upper floors, requires proper precautions. Always use a sturdy ladder with rubber feet and have someone hold it steady while you measure. Wear safety glasses when inspecting older windows, as deteriorating putty or paint chips can fall into your eyes.
Check for lead paint if your home was built before 1978. Don’t sand or scrape painted surfaces without testing first. If you discover mould around the window frame, wear a respirator mask and consider hiring professionals for remediation before proceeding.
Clear the area around your bow window of furniture and decorations. This prevents trips and falls while you move around taking measurements. If measuring from outside, watch for unstable ground, especially after rain or snow.
Find the Best Window Styles for your Home
Step-by-step instructions
Time required: 45-60 minutes for thorough measurement and documentation
Step 1: Prepare the measurement area
Remove window treatments, blinds, and any decorative elements that might obstruct your view of the frame. Clean the window area so you can clearly see the frame edges and identify the exact points where the bow window meets the wall. Take photos of the existing window from multiple angles, including close-ups of hardware, hinges, and any visible damage.
Identify whether you have a full-frame or insert installation. Full-frame replacements require measuring the rough opening in the wall, whilst insert replacements measure the existing frame. Most bow window replacements in Canada use full-frame installation for better energy efficiency.
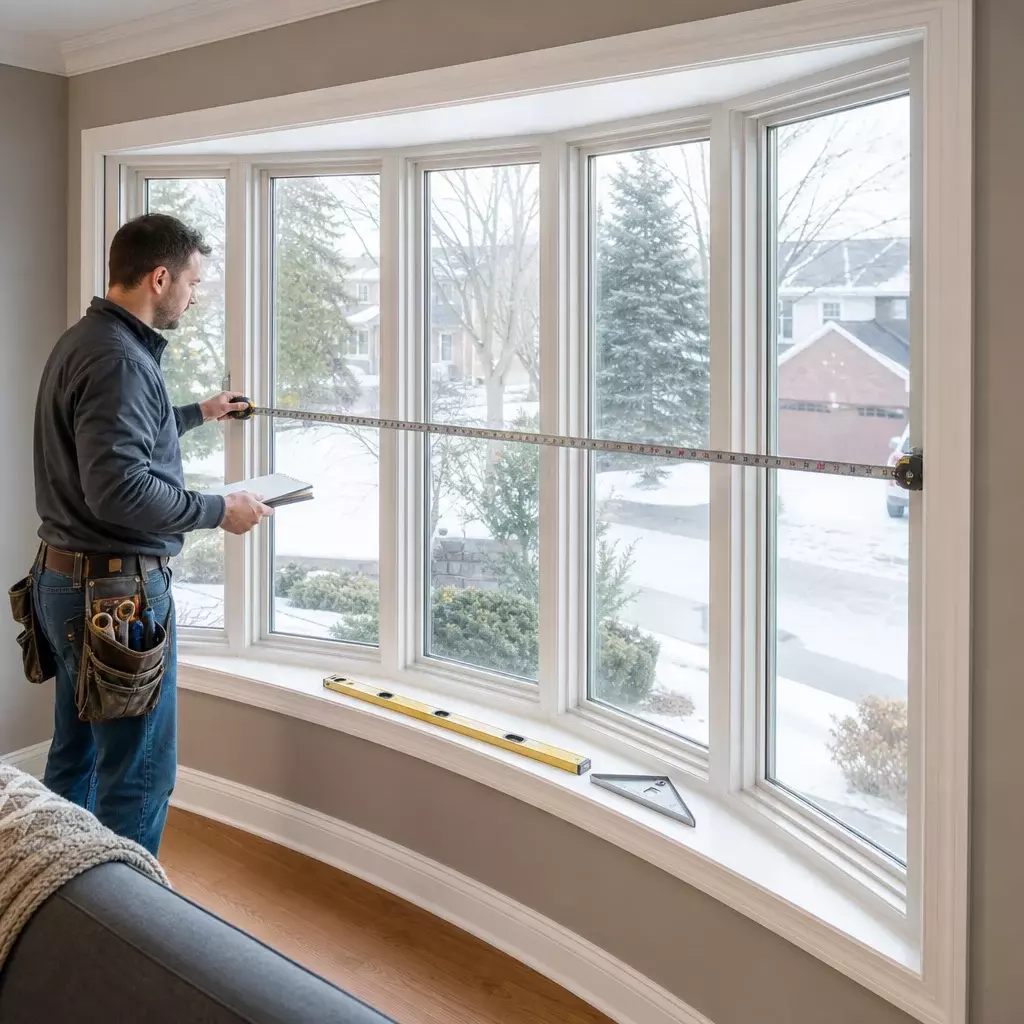
Step 2: Measure the width
Measure the width of the opening at three points: top, middle, and bottom. Place your tape measure against the inside edges of the frame where it meets the wall. Record all three measurements to the nearest millimetre. The smallest measurement is your ordering width, as this ensures the new window will fit even if the opening isn’t perfectly uniform.
For bow windows, you’ll also need to measure the chord width (straight-line distance across the opening) and the arc width (following the curve of the bow). Eugene Siukayev, Project Manager, notes that “the difference between chord and arc measurements typically ranges from 150mm to 300mm depending on the bow’s projection, and this affects both the window size and installation method.”
Step 3: Measure the height
Take height measurements on the left side, right side, and centre of the opening. Measure from the top of the frame (or header) down to the sill at each location. Again, use the smallest measurement for ordering purposes. Height variations exceeding 12mm may indicate foundation settlement or structural issues that need addressing before installation.
Check the sill for level using your 6-foot level. If the sill slopes more than 6mm over its length, note this in your measurements. Proper drainage requires a slight outward slope, but excessive angles create installation challenges.
Step 4: Determine the depth and jamb measurements
Measure the jamb depth from the exterior wall surface to the interior wall surface. This measurement tells you how deep the window frame needs to extend. Standard wall depths in Canadian homes range from 140mm to 165mm for 2×4 construction and 190mm to 215mm for 2×6 construction.
Also measure the projection distance—how far the bow extends outward from the wall. This typically ranges from 200mm to 460mm. The projection affects both the interior space and the exterior appearance, so maintaining similar dimensions often looks best.
Step 5: Check for square
Measure both diagonals from corner to corner across the opening. If both diagonal measurements match within 6mm, your opening is square. Larger discrepancies mean the opening is out of square, which you must communicate to your installer. They may need to adjust the rough opening or use shimming techniques during installation.
Use your carpenter’s square to check each corner individually. Place it firmly in each corner and look for gaps between the square and the frame. Mark any corners that aren’t true 90-degree angles.
Step 6: Count and measure individual sections
Bow windows typically consist of four, five, or six individual window units joined together. Count how many sections your current window has and measure each section’s width. Note which sections are operable (usually the end units) and which are fixed. This information helps you specify a replacement with similar functionality.
Measure the angles between sections if possible. Most bow windows use 10-degree angles between units, but custom configurations exist. Your window manufacturer needs these specifications to fabricate a properly curved replacement.
Step 7: Document frame type and condition
Identify your current frame material—vinyl, wood, aluminium, or composite. Examine the frame for rot, rust, or deterioration. Use your flashlight to inspect corners and bottom edges where moisture accumulates. A moisture meter reading above 20% indicates active water intrusion that requires repair.
Check the condition of the exterior trim, brickmould, and interior casing. Damaged trim often needs replacement during window installation, affecting your project budget and timeline.
Step 8: Measure head height and sill height
Measure from the floor to the bottom of the window sill (sill height) and from the floor to the top of the window opening (head height). These measurements ensure your replacement window sits at the same height as the original, maintaining both interior aesthetics and exterior symmetry with other windows.
Standard sill heights range from 600mm to 900mm above the floor, but bow windows in dining rooms or living rooms may sit lower to maximize views. Head heights typically fall between 2,000mm and 2,400mm.
Step 9: Record all measurements and create a sketch
Draw a simple diagram of your bow window showing all measurement points. Label each dimension clearly. Include notes about which sections open, the direction they open (inward or outward), and any special features like Low-E glass or argon gas fills.
Take this documentation to your window supplier. Professional manufacturers like Total Home Windows and Doors often send their own technicians to verify measurements before fabrication, but your preliminary measurements help with quotes and planning.
Common mistakes to avoid
| Mistake | How to fix or prevent it |
|---|---|
| Measuring only one width and height point | Always take three measurements across width and height; openings are rarely perfectly uniform due to settling |
| Forgetting to measure the projection depth | Measure how far the bow extends from the wall; this affects both aesthetics and structural support requirements |
| Using a cloth tape measure that stretches | Use a steel tape measure for accuracy; cloth tapes can stretch 6-12mm over long distances |
| Not checking diagonal measurements | Measure both diagonals to verify the opening is square; out-of-square openings need special installation techniques |
| Measuring to the trim instead of the frame | Measure to the actual frame or rough opening, not decorative trim which gets removed during installation |
| Ignoring the number and type of operable sections | Document which sections open and their operation type; this affects ventilation and matches your current functionality |
Cost breakdown
Bow window replacement costs vary significantly based on size, materials, and installation complexity. Understanding the price components helps you budget appropriately and make informed decisions.
Material costs
A standard four-section vinyl bow window measuring 2,400mm wide costs between $2,800 and $4,500 for the unit alone. Five-section configurations run $3,500 to $5,800, whilst six-section models range from $4,200 to $7,200. Premium materials like wood or fibreglass add 30-50% to these base prices.
Double-pane glass with Low-E coating represents the standard specification. Upgrading to triple-pane glass adds $600 to $1,200 per window but significantly improves energy performance in Canadian climates. Custom colours, decorative grilles, and specialty hardware increase costs by $200 to $800.
Professional installation costs
Professional installation for bow windows typically costs $800 to $1,500, depending on accessibility, structural modifications needed, and regional labour rates. Second-storey installations cost 20-40% more due to scaffolding requirements and increased labour time.
Full-frame installation, which removes the existing window down to the rough opening, costs more than insert installation but provides better insulation and longer lifespan. Most professionals recommend full-frame replacement for windows over 20 years old.
Additional expenses to consider
Budget for potential structural repairs if measuring reveals rot, mould, or framing damage. Repairs typically cost $300 to $1,200 depending on severity. New exterior trim and interior casing add $150 to $400. If your bow window includes a seat or shelf, custom carpentry work ranges from $400 to $1,000.
Some municipalities require building permits for window replacement, costing $50 to $200. Energy-efficient upgrades may qualify for the Canada Greener Homes Grant, offering rebates up to $5,000 for qualifying improvements.
DIY vs professional installation
Deciding between DIY and professional installation affects both cost and quality. Bow windows present unique challenges that make professional installation the safer choice for most homeowners.
When DIY might work
DIY installation makes sense only if you have:
- Previous experience installing at least three standard windows successfully
- Two or more helpers available (bow windows weigh 70-150kg)
- Proper scaffolding or staging for safe exterior access
- Carpentry skills to handle minor structural adjustments
- Tools including circular saw, drill, level, and caulking equipment
- Time to complete the project within one day to avoid weather exposure
When to hire professionals
Professional installation is essential when:
- Your home has brick, stone, or stucco exterior requiring specialized cutting and sealing
- The window sits on the second storey or higher
- Structural repairs or header reinforcement are needed
- You lack experience with window installation or carpentry
- The manufacturer’s warranty requires professional installation
- Local building codes mandate licensed contractors for window work
Alexandr Naumov, Project Manager, emphasizes that “bow windows require precise installation to prevent water infiltration and structural stress. We see costly damage from DIY installations where improper flashing or inadequate support caused leaks within the first year.”
Professional installers carry liability insurance and provide warranties covering both materials and workmanship, typically for 10-25 years.
Cost comparison table
| Aspect | DIY installation | Professional installation |
|---|---|---|
| Labour cost | $0 (your time) | $800-$1,500 |
| Tool rental/purchase | $150-$400 | Included |
| Installation time | 8-16 hours over 2-3 days | 4-8 hours in one day |
| Warranty coverage | Materials only | Materials and workmanship |
| Risk of errors | High (potential leaks, drafts) | Low (experienced installers) |
| Building code compliance | Your responsibility | Guaranteed by contractor |
Cherry Jian, Sales Consultant, notes that “homeowners who attempt DIY bow window installation often spend more correcting mistakes than they would have paid for professional installation initially. The complex geometry and weight of bow windows make them particularly challenging for inexperienced installers.”
Next steps for your bow window replacement
Now that you’ve gathered accurate measurements and understand the replacement process, schedule consultations with at least three reputable window manufacturers or installers. Bring your measurement documentation, photos, and questions about energy performance, warranty coverage, and installation timelines. Request detailed quotes that break down material and labour costs separately. Visit showrooms to see bow window options in person and discuss how different configurations might improve your home’s comfort and appearance. Most manufacturers offer free in-home consultations where experienced technicians verify your measurements and provide accurate pricing—take advantage of this service to ensure your replacement project starts with precise specifications.
FAQ
How do I know if my rough opening measurements are accurate enough?
Your measurements are accurate when width and height variations stay within 6mm across all measurement points, diagonal measurements match within 6mm, and you’ve recorded dimensions at three points for both width and height using a steel tape measure.
Can I replace a bow window with a different size?
Yes, but changing sizes requires structural modifications including reframing the rough opening, adding or removing headers, and potentially adjusting exterior siding and interior drywall. These alterations add $1,200 to $3,500 to your project cost and require building permits.
What’s the difference between measuring for insert vs full-frame replacement?
Insert replacement measures the existing frame interior dimensions since the new window fits inside the old frame. Full-frame replacement measures the rough opening in the wall after removing the entire existing window, providing more accurate sizing and better energy efficiency.
How much projection should a replacement bow window have?
Standard bow window projection ranges from 200mm to 460mm from the wall surface. Match your existing projection unless you specifically want to change the interior space or exterior appearance. Deeper projections create more interior shelf space but require stronger structural support.
Do I need to measure each glass panel separately in a bow window?
No, measure the entire bow window assembly as one unit including overall width, height, and projection. However, count the number of sections and note which panels are operable so your replacement matches the original configuration and functionality.