Trimming an exterior door involves removing material from the door’s height or width to ensure proper clearance, smooth operation, and weathertight performance. Most homeowners need to trim between 3-6mm from the bottom edge to accommodate new flooring, threshold adjustments, or seasonal wood expansion. This straightforward modification prevents dragging, sticking, and air leaks whilst maintaining structural integrity and warranty coverage when done correctly.
Key takeaways
- Remove only 6mm maximum from solid doors and 3mm from hollow-core units to preserve structural strength and avoid exposing internal components
- Seal all freshly cut edges within 2 hours using exterior-grade primer and paint to prevent moisture absorption and warping
- Maintain 3mm clearance at the bottom and 2mm on sides for proper operation and weatherstripping contact
- Use carbide-tipped circular saw blades for fiberglass doors and fine-tooth blades for steel to prevent chipping and delamination
- Professional door installation services cost $150-$300 CAD but include warranty protection and precise fitting techniques
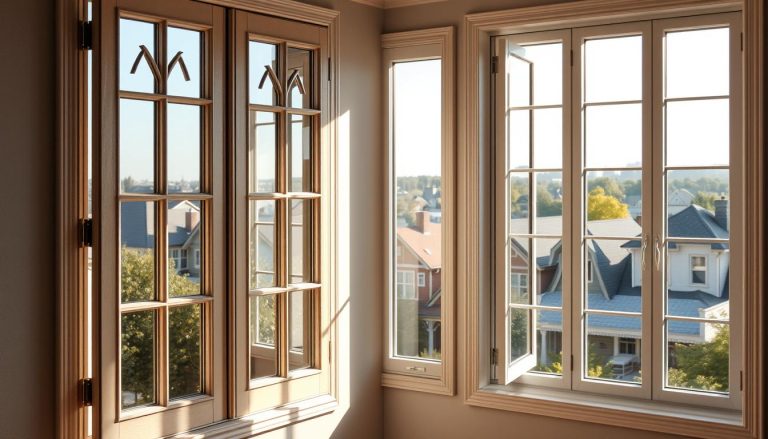
Window and Doors Replacement Near Me
When should you trim an exterior door?
Several situations demand door trimming for optimal performance. New flooring installations frequently raise floor height by 12-25mm, requiring bottom edge reduction. Seasonal humidity changes cause wood and composite doors to swell, creating friction against frames and thresholds. Settling foundations shift door frames, altering clearances that were once adequate.
Winter drafts indicate insufficient bottom clearance for weatherstripping contact. If your door scrapes during opening or closing, immediate trimming prevents hardware damage and finish deterioration. Summer months present ideal conditions for this work—low humidity ensures accurate measurements that account for winter expansion.
Cost considerations favour DIY trimming when the adjustment measures less than 6mm. Beyond this threshold, frame modifications or professional intervention become necessary. Steel doors with magnetic weatherstripping require precise 2mm gaps, whilst exterior doors with complex core structures need expert assessment.
“Homeowners often underestimate how seasonal wood movement affects door operation,” explains Vitaly Shapiro, Vice President of Sales. “Trimming during high-humidity periods leads to excessive winter gaps that compromise energy efficiency and invite drafts. Always measure and cut during dry conditions for year-round performance.”
Tools and materials you’ll need
Gathering proper equipment before starting prevents mid-project delays and ensures clean results. Quality tools produce professional-grade cuts that maintain door integrity.
Essential tools:
- Circular saw with carbide-tipped blade (40-60 teeth)
- Straightedge clamp guide (minimum 2m length)
- Power planer or hand plane for minor adjustments
- Measuring tape and combination square
- Pencil and marking knife
- Sawhorses or work table
- Safety glasses and dust mask
- Sandpaper (80-grit and 150-grit)
Required materials:
- Exterior-grade primer suitable for door material
- Matching paint or stain system
- Painter’s tape (50mm width)
- Wood filler for fiberglass doors
- Disposable brushes or foam applicators
- Clean rags and mineral spirits
Material selection depends on your door type. Vinyl and composite materials require specialized blades that prevent melting. Steel units need metal-cutting blades with appropriate tooth configuration.
Safety notes
Door trimming involves power tools and heavy materials that demand proper precautions. Always wear impact-resistant safety glasses—wood chips and metal fragments travel at high velocity during cutting. Respiratory protection prevents inhalation of fiberglass particles, wood dust, and steel particulates that cause long-term health issues.
Secure doors firmly on stable sawhorses before cutting. Unstable workpieces shift during sawing, causing blade binding, kickback, and potentially severe injuries. Never position your body in line with the blade path. Disconnect power tools when changing blades or making adjustments.
Work in well-ventilated areas when applying primers and sealants. Solvent fumes accumulate quickly in enclosed spaces, causing dizziness and respiratory irritation. Keep fire extinguishers nearby when working with flammable finishing products. Lift doors using proper technique—bend at knees, keep back straight, and request assistance for units exceeding 35kg. Most fiberglass doors weigh 40-50kg, requiring two-person handling.
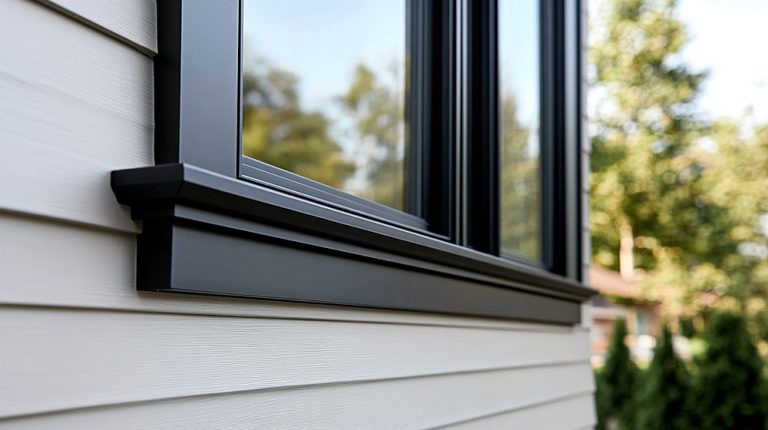
Find the Best Window Styles for your Home
Step-by-step instructions
Time required: 2-3 hours including drying time for sealant application
Step 1: Remove the door from hinges
Close the door and tap hinge pins upward using a hammer and nail set, starting with the bottom hinge. Support the door weight whilst removing the final pin to prevent frame damage. Carry the door to your prepared work area and place it on padded sawhorses. Label hinge positions with tape if hardware will be reinstalled in original locations.
Step 2: Measure and mark cutting lines
Measure the required reduction amount at three points across the door width—both edges and centre. Add 2mm to account for blade kerf and final sanding. Mark measurements clearly on both door faces using a sharp pencil. Connect marks with a straightedge, creating a continuous cutting line. Apply painter’s tape along the cut line on the finish side to prevent splintering.
Step 3: Set up cutting guides
Clamp a metal straightedge parallel to your cutting line, offsetting it by the distance from your saw blade to the base plate edge. This offset varies by saw model—measure yours precisely. Ensure clamps secure the guide at both ends without creating gaps. Double-check measurements before proceeding. Place scrap wood beneath the door to prevent sawing into sawhorses.
Step 4: Make the cut
Set circular saw depth to 3mm beyond door thickness. Position the saw base against the straightedge guide with the blade clear of material. Start the saw and allow it to reach full speed before entering the cut. Maintain steady forward pressure whilst keeping the base plate firmly against the guide. Complete the cut in one smooth pass without stopping mid-cut, which creates burn marks and blade deflection.
Step 5: Smooth the cut edge
Remove painter’s tape and examine the cut edge for splinters or rough spots. Sand the edge with 80-grit sandpaper wrapped around a sanding block, working in the direction of door thickness. Progress to 150-grit paper for final smoothing. Wipe the edge clean with a damp cloth to remove all dust before sealing. This preparation ensures proper primer adhesion and prevents future moisture problems.
Step 6: Seal and finish the edge
Apply exterior-grade primer to the freshly cut edge within 2 hours of cutting. Use a foam brush for smooth application without brush marks. Allow primer to dry according to manufacturer specifications—typically 2-4 hours in moderate temperatures. Apply two coats of finish paint or stain matching the door surface. Pay special attention to end grain, which absorbs more finish than face surfaces. Consider energy-efficient performance when selecting sealants.
Step 7: Reinstall and test operation
Lift the door back into the frame opening and align hinge leaves. Insert hinge pins from top to bottom, tapping them fully seated. Open and close the door several times, checking for smooth operation without binding. Verify weatherstripping contact along all edges. Adjust strike plate position if latch engagement feels tight or loose. Confirm 3mm bottom clearance using a stack of coins or feeler gauge.
“The most common mistake is rushing the sealing step,” notes Eugene Siukayev, Project Manager. “Unsealed edges absorb moisture within hours, causing swelling that negates your careful trimming work. I’ve seen doors expand 6mm in a single rainy week when edges weren’t properly sealed immediately after cutting.”
Common mistakes to avoid
| Mistake | Solution |
|---|---|
| Cutting too much material in one pass | Remove material in 3mm increments, testing fit between cuts to prevent over-trimming |
| Measuring from uneven floor surfaces | Measure from threshold or frame bottom, not floor level which varies across width |
| Using dull or incorrect blade types | Install fresh carbide blades with appropriate tooth count for door material composition |
| Cutting hollow-core doors excessively | Limit removal to 3mm maximum to avoid exposing hollow interior and weakening structure |
| Ignoring manufacturer warranty terms | Review warranty documentation before cutting—some manufacturers void coverage for field modifications |
| Trimming composite doors without proper blades | Use specialized composite-cutting blades that prevent delamination and maintain core integrity |
Temperature considerations affect cutting accuracy. Wood doors cut in winter conditions may show excessive summer gaps due to expansion. Conversely, summer trimming creates tight winter fits. Account for 3-4mm seasonal movement in solid wood units. Door cost increases significantly when mistakes require complete replacement rather than simple adjustments.
Cost breakdown
Understanding project expenses helps you budget appropriately and decide between DIY and professional approaches. Material and labour costs vary based on door type, condition, and complexity.
| Item | DIY Cost (CAD) | Professional Cost (CAD) |
|---|---|---|
| Basic tool rental (saw, guides) | $45-65/day | Included in service |
| Consumables (blades, sandpaper, tape) | $25-40 | Included in service |
| Primer and finish materials | $30-50 | $40-60 |
| Labour for standard door | Your time (2-3 hours) | $150-300 |
| Complex doors (steel, insulated) | Not recommended | $200-400 |
Factors affecting price:
- Door material composition—steel and fiberglass require specialized equipment
- Amount of material removal—cuts exceeding 6mm need frame modifications
- Number of doors requiring service in single visit
- Accessibility challenges like narrow hallways or elevated installations
- Seasonal demand—spring and autumn see higher service rates
- Geographic location within Ontario affects travel and labour costs
Professional services include warranty coverage for workmanship, ensuring proper operation for 1-2 years. This protection proves valuable when dealing with expensive steel door units or complex multi-point locking systems. DIY approaches save $150-250 per door but carry risks of improper cuts that compromise security and weatherproofing.
DIY vs professional installation
| DIY | Professional | |
|---|---|---|
| Benefits | Lower immediate cost ($100-155), flexible scheduling, learning valuable home maintenance skills, satisfaction of self-completion | Guaranteed results with warranty coverage, specialized tools and expertise, proper material identification, insurance protection, time savings (1 hour vs 3 hours) |
| Risks | Potential for over-cutting or uneven edges, voided manufacturer warranties, tool rental expenses, personal injury from power equipment, moisture damage from improper sealing | Higher upfront cost ($150-400), scheduling delays during peak seasons, less control over process timing, potential for contractor quality variations |
Choose DIY when trimming simple hollow-core or solid wood doors requiring less than 6mm removal. Your existing tool collection and previous woodworking experience make this approach practical. Professional service becomes essential for aluminum doors, insulated steel units, or situations involving complex weatherstripping systems.
Consider hiring professionals when dealing with patio doors or units with multi-point locking mechanisms. These systems require precise clearances that affect security and weather resistance. Insurance coverage through professional services protects against accidental damage during trimming operations.
“We see many homeowners attempt door trimming to save money, then call us to fix mistakes that cost more than original professional service,” shares Alexandr Naumov, Project Manager. “Steel doors particularly suffer from DIY attempts—improper cuts expose insulation cores to moisture, creating rust problems that require complete door replacement within months. The $200 professional fee prevents $1,500 replacement costs.”
Next steps for your door project
Ready to achieve perfect door operation? Start by measuring your clearance requirements during dry weather conditions for accurate seasonal planning. If trimming requirements exceed 6mm or your door features complex construction, contact Total Home Windows and Doors for professional assessment. Our experienced team handles all door types with precision equipment and provides warranty-backed results. Visit our showroom to discuss your specific needs or schedule an in-home consultation today. We’ll ensure your exterior doors operate smoothly year-round whilst maintaining energy efficiency and security performance.
FAQ
Can you trim a steel exterior door?
Yes, steel doors can be trimmed up to 6mm from the bottom edge using metal-cutting circular saw blades. The process requires sealing exposed steel immediately with rust-inhibiting primer to prevent corrosion. Magnetic weatherstripping systems need precise clearances for proper operation.
How much can you safely trim off a hollow-core door?
Hollow-core doors allow maximum 3mm removal before exposing internal cardboard honeycomb structure. Exceeding this limit compromises structural integrity and creates unsightly voids. Most hollow-core units feature 25mm solid wood rails at top and bottom specifically for minor trimming operations.
What happens if you don’t seal a trimmed door edge?
Unsealed edges absorb moisture rapidly, causing wood expansion, warping, and finish failure within weeks. Fiberglass and composite materials delaminate when moisture penetrates cut edges. Steel doors develop rust that spreads beneath factory finish. Always seal within 2 hours of cutting regardless of weather conditions.
Do you need to remove the door to trim it?
Yes, removing the door ensures safe, accurate cutting with proper support. Attempting to trim installed doors creates dangerous situations with power tools and produces uneven cuts. Removal also allows complete edge sealing and prevents sawdust contamination of weatherstripping and threshold components.
Will trimming my door void the manufacturer warranty?
Most manufacturers permit minor trimming within specified limits without voiding coverage. Review warranty documentation before cutting—some brands require professional installation for warranty validity. Excessive material removal or improper sealing techniques typically void structural and finish warranties. Keep documentation of all modifications for future reference.