

Lubricating a garage door involves applying the correct lubricant to metal rollers, hinges, tracks, and springs every six months to reduce friction and noise. Use silicone-based or lithium grease spray, avoid WD-40, and wipe away excess. This simple maintenance task extends door lifespan, prevents costly repairs, and ensures smooth operation throughout Canadian winters and summers.
Key takeaways
- Apply lubricant to metal rollers, hinges, springs, and tracks every six months to maintain smooth operation and prevent premature wear on moving components.
- Silicone-based spray or white lithium grease work best in Canadian climates, while WD-40 should be avoided as it attracts dust and degrades over time.
- Clean tracks and components before lubricating to remove dirt buildup that causes friction and noise during door operation.
- Proper lubrication reduces energy costs by allowing garage door openers to work more efficiently and extends hardware lifespan by up to 50%.
- Listen for grinding or squeaking sounds between maintenance sessions, as these indicate immediate lubrication needs regardless of your schedule.
Window and Doors Replacement Near Me
When should you lubricate your garage door?
Most homeowners should lubricate their garage doors twice yearly—typically in spring and autumn. These seasonal transitions bring temperature changes that affect metal components and lubricant viscosity. Canadian winters are particularly harsh on garage door mechanisms, making pre-winter lubrication essential.
Watch for warning signs between scheduled maintenance. Squeaking, grinding, or jerky movements indicate your door needs immediate attention. If you notice resistance when opening manually or hear your opener straining, don’t wait for your next scheduled service. Doors in high-use households or exposed to extreme weather may require quarterly lubrication.
Cost considerations matter too. Spending $10-15 on lubricant twice yearly prevents $200-500 repairs down the line. Regular maintenance extends component lifespan significantly. Winter weather creates additional challenges—salt, moisture, and temperature fluctuations accelerate wear on unprotected metal parts.
Tip: Mark your calendar for April and October lubrication sessions. This timing prepares your door for summer heat and winter cold, the two most demanding seasons for garage door hardware.
According to Daniel Klein, Project Manager, “Homeowners who maintain a consistent lubrication schedule see dramatically fewer emergency repair calls. The investment of 20 minutes twice a year saves hundreds in potential repairs and extends the door’s operational life by years.”
Tools and materials you’ll need
Gathering the right supplies before starting makes the job faster and more effective. Quality products designed for garage doors outperform general-purpose alternatives.
Essential tools:
- Step ladder or sturdy stool
- Clean rags or microfibre cloths
- Vacuum with brush attachment
- Protective gloves and safety glasses
- Putty knife or plastic scraper
Required materials:
- Silicone-based spray lubricant or white lithium grease
- Degreaser or all-purpose cleaner
- Small wire brush for stubborn debris
- Newspaper or drop cloth for floor protection
Avoid using WD-40 as your primary lubricant. While it works well for cleaning and loosening stuck parts, it’s too thin for long-term lubrication and attracts dust. Silicone spray works brilliantly in Canadian climates because it doesn’t thicken in cold weather or thin out in summer heat. White lithium grease provides excellent protection for springs and heavy-duty components.
Safety notes
Garage door systems operate under extreme tension, with springs holding hundreds of pounds of force. Never attempt to adjust, remove, or lubricate torsion springs yourself—these components require professional expertise. One wrong move can cause serious injury. Keep children and pets away from the work area during maintenance.
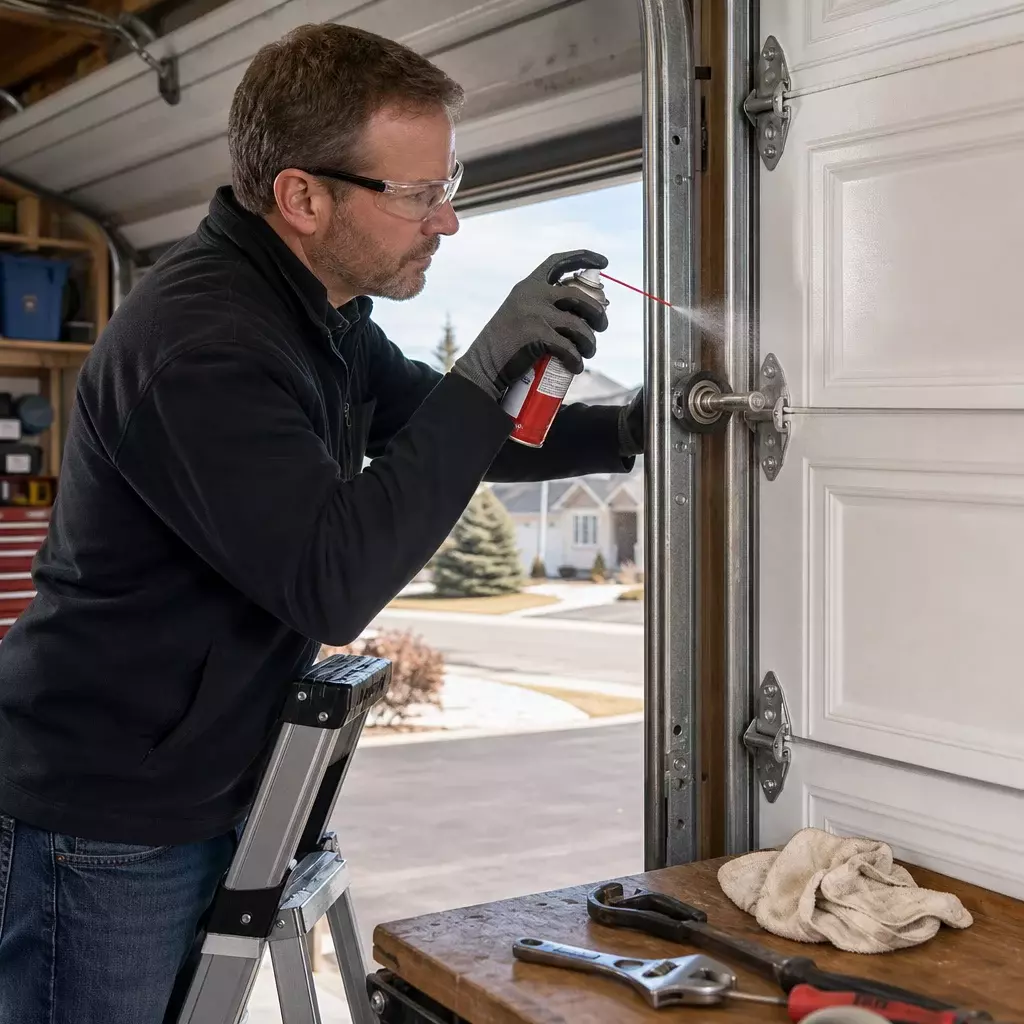
Disconnect the garage door opener before starting work by pulling the emergency release cord. This prevents accidental activation while you’re working near moving parts. Wear safety glasses to protect your eyes from dripping lubricant and debris. Gloves prevent skin contact with chemicals and protect your hands from sharp edges on tracks and hardware.
Ensure proper ventilation when working with aerosol lubricants. Open the garage door fully and turn on fans if available. Work during daylight hours or use bright work lights to see all components clearly. Never stand directly under a raised door, and always use a stable ladder positioned on level ground.
Find the Best Window Styles for your Home
Step-by-step instructions
Time required: 20-30 minutes
Step 1: Prepare the work area
Disconnect your garage door opener by pulling the red emergency release handle. This disengages the trolley and allows manual operation. Lower the door completely and place newspaper or a drop cloth beneath the tracks to catch drips. Remove any items stored near the door that might interfere with your work. Check that your ladder is stable and positioned where you can reach all components safely.
Step 2: Clean the tracks and components
Use a vacuum with a brush attachment to remove loose dirt, cobwebs, and debris from tracks and rollers. Spray degreaser on a rag and wipe down the inside of the tracks, removing built-up grime. Don’t spray cleaner directly into tracks as excess liquid can pool. Use a wire brush for stubborn deposits on rollers and hinges. Clean metal surfaces allow lubricant to adhere properly and work effectively.
Step 3: Lubricate the rollers
Apply lubricant to the roller bearings, not the wheels themselves. Hold the spray nozzle close to the bearing and give each one a two-second burst. If you have nylon rollers, lubricate only the steel bearings in the centre. Metal rollers need coating on both the bearing and the roller surface. Rotate each roller by hand to work lubricant into the bearing mechanism. Expect 10-12 rollers on standard residential doors.
Step 4: Treat the hinges
Spray lubricant into each hinge where the pin meets the bracket. Focus on the pivot points where metal rubs against metal during operation. Open and close the door manually a few inches to work lubricant into the hinge joints. Don’t forget the hinges at the top of the door where panels connect. These often get overlooked but experience significant stress during operation.
Step 5: Lubricate the springs
For extension springs (the ones running along the horizontal tracks), apply lubricant along the entire length while the door is closed. The spring should glisten but not drip. For torsion springs (mounted above the closed door), spray along the coils from one end to the other. Never attempt to adjust spring tension yourself. If springs appear damaged, rusty, or worn, contact a professional immediately for garage door replacement assessment.
Step 6: Address the tracks
Apply a thin layer of lubricant to the inside of the vertical and horizontal tracks. Don’t overdo it—excess lubricant collects dirt and creates sticky buildup. Use a clean rag to spread lubricant evenly and remove any excess. The goal is a light coating that reduces friction, not a heavy grease layer. Pay special attention to curved sections where the track transitions from vertical to horizontal.
Step 7: Lubricate the lock mechanism
If your door has a manual lock, spray lubricant into the keyhole and on the latch mechanism. Insert and turn the key several times to distribute lubricant inside the lock cylinder. Lubricate the throw bolt and any moving parts of the locking bar. This prevents locks from seizing during winter months when you might need them most.
Step 8: Service the opener chain or belt
For chain-drive openers, apply lubricant to the chain while running the opener slowly. Use the wall button to open the door partially, spray a section of chain, then advance it and repeat. Belt-drive systems typically don’t require lubrication, but check your owner’s manual. Lubricate the rail trolley where it slides along the track. This reduces wear and quiets operation significantly.
Step 9: Test and adjust
Reconnect the opener by pulling the emergency release toward the door until the trolley re-engages. Open and close the door several times using both the opener and manual operation. Listen for unusual sounds and watch for smooth movement. The door should glide quietly without jerking or hesitation. Wipe away any lubricant that dripped onto the floor or door panels to prevent staining.
Step 10: Final inspection
Check all components visually for proper lubrication coverage. Look for any parts you might have missed, particularly hinges at the door’s edges. Inspect springs for signs of rust or damage while you’re focused on them. Test the door balance by disconnecting the opener and lifting manually to chest height—it should stay in place. If it falls or rises, spring tension needs professional adjustment.
Best window companies reviews
Common mistakes to avoid
| Mistake | How to Fix It |
|---|---|
| Using WD-40 as primary lubricant | Switch to silicone spray or lithium grease designed for garage doors; WD-40 evaporates quickly and attracts dirt |
| Over-lubricating tracks and components | Apply thin, even coats; wipe away excess immediately to prevent dirt accumulation and dripping |
| Neglecting to clean before lubricating | Always remove old grease and debris first; lubricant can’t work properly over dirty surfaces |
| Lubricating nylon roller wheels | Apply lubricant only to metal bearings inside nylon rollers, not the wheel surface itself |
| Attempting to adjust spring tension | Never touch spring adjustment mechanisms; call professionals for any spring-related issues |
| Ignoring unusual sounds after lubrication | Grinding or scraping after maintenance indicates damaged components requiring professional inspection |
Vitaly Shapiro, Vice President of Sales, notes, “The most common error we see is homeowners using inappropriate lubricants or applying them incorrectly. This actually accelerates wear rather than preventing it. Using the right product in the right places makes all the difference in door longevity.”
Cost breakdown
Understanding the financial aspects of garage door maintenance helps you make informed decisions about DIY versus professional service.
| Service Type | Cost Range (CAD) |
|---|---|
| DIY lubrication supplies | $15-30 (lasts multiple applications) |
| Professional lubrication service | $80-150 per visit |
| Annual DIY maintenance cost | $10-15 |
| Annual professional maintenance | $160-300 |
| Silicone spray lubricant | $8-15 per can |
| White lithium grease | $12-18 per can |
| Complete maintenance kit | $25-40 |
Factors affecting price:
- Door size and number of panels (more panels mean more hinges to service)
- Type of opener system (chain drives require more frequent lubrication than belt drives)
- Climate conditions (harsh winters demand premium cold-weather lubricants)
- Door age and condition (older doors may need additional cleaning products)
- Accessibility (high ceilings or awkward spaces may require specialized equipment)
Professional services typically include full inspection, adjustment, and lubrication. While more expensive upfront, they catch potential problems early. DIY maintenance saves money but requires your time and attention to detail. Most homeowners find DIY lubrication straightforward enough to handle independently, reserving professional visits for annual comprehensive inspections.
Tip: Buy lubricant in bulk or multi-packs to reduce per-application costs. A single can of quality silicone spray typically lasts 4-6 applications, making the actual cost per maintenance session under $5.
DIY vs professional installation
| DIY | Professional | |
|---|---|---|
| Benefits | Saves $140-270 annually; convenient scheduling; builds home maintenance skills; immediate attention to issues | Comprehensive inspection included; catches problems early; proper tools and expertise; warranty on service work; adjustments and repairs performed |
| Risks | Potential for injury if safety ignored; may miss underlying problems; incorrect products can damage components; time investment required | Higher cost; scheduling required; may include unnecessary upsells; dependency on service availability |
Most Canadian homeowners successfully handle basic garage door lubrication themselves. The task requires no special skills and minimal investment. However, combine DIY lubrication with annual professional inspections for best results. Technicians spot worn cables, misaligned tracks, and failing components that untrained eyes miss.
Consider professional service if you notice persistent problems after lubrication, lack confidence working with mechanical systems, or have physical limitations that make ladder work unsafe. The peace of mind and thorough inspection often justify the cost, especially for larger garage doors or complex opener systems.
Eugene Siukayev, Project Manager, explains, “We recommend homeowners handle routine lubrication themselves but schedule professional service annually. This approach balances cost savings with safety. Our technicians often discover issues during routine maintenance that would have become expensive emergencies if left unaddressed.”
Ready to maintain your garage door?
Regular lubrication transforms your garage door’s performance and extends its lifespan significantly. Set a reminder on your phone for April and October, gather your supplies, and dedicate 30 minutes to this essential task. Your door will operate more quietly, your opener will last longer, and you’ll avoid costly emergency repairs. If you’re experiencing persistent issues even after proper lubrication, or if your door is showing signs of significant wear, it might be time to explore replacement options. Visit our showroom to see modern garage door solutions that offer superior insulation, security, and reliability for Canadian homes.
FAQ
How often should I lubricate my garage door in Canadian winters?
Lubricate twice yearly minimum, with an additional application in mid-winter if you notice increased noise or resistance. Cold temperatures cause lubricants to thicken, reducing effectiveness. Spring and autumn applications prepare your door for seasonal extremes.
Can I use motor oil to lubricate my garage door?
Motor oil isn’t recommended for garage doors. It’s too heavy, attracts excessive dirt, and doesn’t provide the right protection for high-speed moving parts. Silicone spray or white lithium grease formulated for garage doors performs significantly better.
Why does my garage door still squeak after lubrication?
Persistent squeaking after proper lubrication indicates worn rollers, loose hardware, or misaligned tracks. Check that all bolts are tight and rollers spin freely. If noise continues, worn components likely need replacement by a professional technician.
Should I lubricate the garage door tracks?
Apply only a light coating to track interiors. Heavy lubrication in tracks collects dirt and creates sticky buildup that impedes door movement. Focus lubrication efforts on rollers, hinges, springs, and pivot points instead for best results.
What’s the difference between silicone spray and lithium grease?
Silicone spray penetrates quickly, works well in extreme temperatures, and doesn’t attract dust. Lithium grease provides thicker, longer-lasting protection for heavy-duty components like springs. Many homeowners use both: silicone for rollers and hinges, lithium for springs.